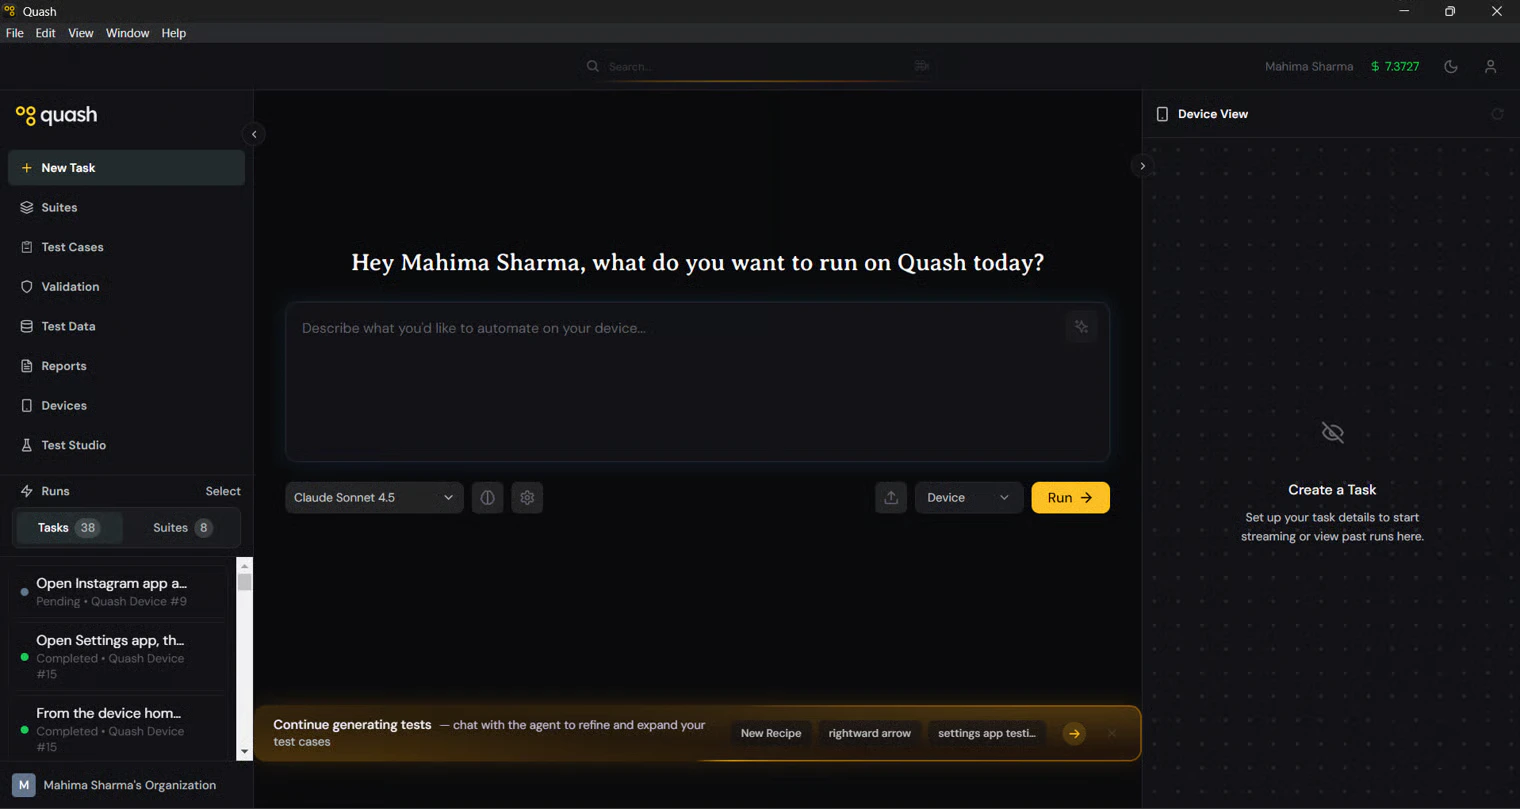
Documentation Index

Fetch the complete documentation index at: https://quashbugs.com/docs/llms.txt

Use this file to discover all available pages before exploring further.

Quash is a desktop application with a left navigation panel, a central workspace, and context panels that slide in from the right. This page maps every section of the interface so you know where everything lives before you start.

The interface

When you open Quash, you see three areas: Left navigation panel — the vertical sidebar on the left. This is how you move between every major section of Quash. It stays visible at all times. Central workspace — the main area where you do your work. What appears here changes depending on which section you have open — a recipe conversation in Test Studio, a list of test cases in Test Cases, a report detail view in Reports. Right-side panels — slide-in panels that appear when you click controls on the right edge of the screen. In Test Studio, these include the TESTS panel (showing generated test cases) and the CONFIG panel (controlling how Recipe generates tests). In Reports, the Device View panel shows the screen recording. The profile button in the top-right corner opens your account settings, organisation details, device management, and integrations.

What each section does

The left navigation panel contains every top-level section in Quash.
SectionPurpose
Test StudioWhere you generate test cases using the Recipe agent. Open a recipe, attach context (your app, GitHub branch, Figma designs, Jira tickets, PRDs), write a prompt, and Recipe produces structured, executable test cases. This is where most test creation happens.
Test CasesThe central library of all your saved test cases — whether generated by Recipe or written manually. Search, filter, edit, tag, and add them to suites from here.
TasksAd-hoc test execution. Write a single plain English instruction, pick a device, and run it immediately. No suite setup required. Best for quick checks and one-off exploration.
SuitesCollections of test cases grouped to run as a unit. Create suites, add test cases from your library, choose sequential or isolated execution mode, and trigger runs across one or more devices.
AppsWhere you configure everything Quash needs to understand your application. Each app has five tabs: Overview, Builds, Knowledge, Credentials, and Test Data. The deeper you configure an app, the more specific and accurate your generated tests become.
ValidationsBackend validations — API calls that run during test execution to verify backend state matches what the UI shows. Create connections to your API, define validations with expected responses, and reference them in prompts using @slug.
Test DataStructured datasets of test inputs — credentials, form values, product details — stored as named tables. Reference a dataset in any prompt using /slug, and Quash runs the test once per row automatically.
ReportsEvery task and suite run generates an execution report. The Reports section shows a dashboard of all runs, with filters by type and result. Open any report to see the AI-written executive summary, observations, step-by-step breakdown with screenshots, and the full device screen recording.
The profile menu in the top-right also gives access to:
  • Devices — connect and manage physical Android devices, local emulators, iOS simulators, and Quash cloud devices.
  • Integrations — connect Jira, GitHub, Figma, Slack, and other external tools.
  • Organisation & Members — manage your team, invite members, set roles and permissions.
  • Settings — organisation-level configuration including maximum concurrent tasks and ADB path.

The typical workflow

Most teams follow this path once they are set up:
  1. Open Test Studio and create a recipe for the feature you are testing.
  2. Attach context — your app, a GitHub branch, Figma designs, a PRD, a Jira ticket. The more you attach, the better the output.
  3. Write a prompt describing what you want to test. Recipe generates test cases.
  4. Review and save the generated tests to your Test Cases library.
  5. Add test cases to a suite and run the suite on your connected devices.
  6. Read the execution report — executive summary, observations, step-by-step screenshots, and the device recording.
For quick one-off checks, skip steps 1–4 and go straight to Tasks — write a prompt and run it immediately on any connected device.

Where to find things

I want to…Go to
Generate test cases from a prompt or specTest Studio
Write a test case manuallyTest Cases → + New Test Case
Run a quick one-off testTasks → + New Task
Run multiple tests togetherSuites
Upload an APK buildApps → [your app] → Builds
Connect my GitHub repositoryApps → [your app] → Knowledge
Store login credentialsApps → [your app] → Credentials
Create a test data datasetTest Data → + New Dataset
Set up a backend API validationValidations → Create Connection
Connect a deviceProfile → Devices → Scan for devices
See all test resultsReports
Share a report externallyReports → [report] → Share
Connect JiraProfile → Integrations → Jira
Manage team membersProfile → Organisation & Members
Review what the agent has learnedApps → [your app] → Knowledge → Guidance

Next steps

If you are setting up Quash for the first time:
  1. Quickstart — get your first test running in 5 minutes
  2. Devices — connect a physical device, emulator, or cloud device
  3. Apps — configure your app, upload a build, and connect your codebase